Sod Installation
STEP 1 – Soil Preparation |
 For best results, till or spade the area to a depth of 4-6 inches. Rake and smooth the soil, removing rocks, roots and large clumps. Keep the grade 1/2 to 1-inch below sidewalks and driveways. Eliminate drainage issues by having soil slope away from these problem areas. Rake in fertilizer and lime as needed. Ideally, your site should be complete prepped before ordering your sod. |
STEP 2 – Measuring and Ordering your sod |
 Measure the square footage of your area (length x width) and divide by 9. This will provide you with the number of rolls you will need – our rolls of sod are 18″ x 6′ long (9 square feet). Phone Green Meadow Turf at 715-592-6378 to place your order for sod pick up or to schedule a delivery. |
STEP 3 – Sod Installation |
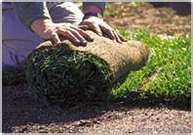 Install your lawn immediately upon delivery. Begin laying sod along the longest straight line, such as a driveway or sidewalk. Butt edges and ends against each other tightly,without stretching. Avoid gaps or overlaps. Stagger the joints in each row in a brick-like fashion, using a large sharp knife for trimming – a serrated kitchen knife works best. Avoid leaving small strips of sod at the outer edges, as they will not retain moisture. On slopes, place the turf pieces across the slope – biodegradeable pegs can be purchased at Green Meadow Turf to aid in holding the sod in place. If you have access to a roller, roll the entire area to improve turf/soil contact and to remove air pockets. |
STEP 4 – Watering your sod |
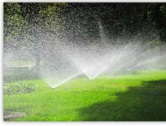 Immediately after installing your sod, give your new lawn about an inch of water. Water daily, keeping the underside of the sod and soil underneath damp. This can be monitored by peeking underneath the roll of sod. Continue watering in this manner until the sod is firmly rooted (about 2 weeks). Gradually, less frequent but deeper waterings will be required. Water areas near buildings, sidewalks and driveways more often; where the reflected heat tends to dry out the sod quicker. |


